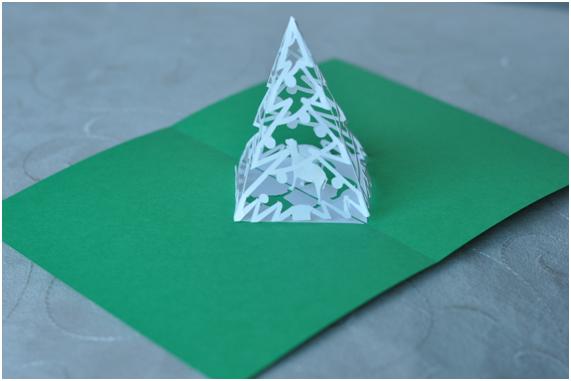
09 Jan Christmas Pop Up Card: Complex Pyramid Tree Tutorial
So here we are, January 9th and I'm posting a tutorial on a Christmas card. One could say that I'm 15 days too late, or one can say that I'm 349 days early for Christmas 2011. Who am I kidding, I'm late. So this is my second tutorial and I'm still learning what to do and what not to do. First of all, this video started out being 30-40 minutes long. I doubt any of you would have the patience to listen through that. So, I had to cut out a lot of extraneous parts and speed things up a bit. Ok, I sped things up a lot. That was the only way I could manage squeezing the tutorial down to 10 minutes, which is still pretty long. I'll keep trying to make these tutorials shorter.
If you don't have the patience to watch the video, here is a summarized set of instructions:
-
Purchase the template for this design here: Christmas Pop Up Card: Complex Pyramid Tree.
- You can print the template directly on your cardstock, but you will see some print lines after you assemble the card
- Or, you can tape the template sheet over your cardstock and cut through the template and the card stock. This is preferred, but more difficult because you do not want the template to shift positions while you cut
-
Score the lines that need to be folded. These lines are dotted. There are a few areas on my template where the dots did not come out, such as the dog's ears, the dog's feet, and the tree branches which still remain attached to the ground. There are 2 ways to score:
- Use your knife and cut very gently half way through the paper. You want to make the cut on the “mountain” side of the fold, so you have to make sure you are scoring the correct side.
- Cut dotted lines through the area you want to fold. This will allow you to make either a “valley” or “mountain” fold. You need to worry less about which side you are scoring.
- Weed all the extraneous pieces from your cutout. This will take patience. Use a sharp X-Acto knife to trip corners that you missed.
- Fold all of your scored lines. Use the X-Acto knife to help control where the fold will be. Don't forget the dog's ears and peeing leg.
- Glue the 2 halves of the dog.
- Glue the tree together starting with the inside tabs.
- Glue the outside tabs.
- Create a 2 backing sheets that are 4.25″x6.5″.
- Glue the first backing to the card, making absolutely sure that you are aligned with the center fold of the card.
-
Glue the second backing to the card when the card is in the open position to make sure that the card opens as desired.
I hope you were able to follow that. Now I can finally start working on the Valentine's Day cards.


Carol
Posted at 12:57h, 10 JanuaryGreat! I’m going to let my Craft Robo cut it, though.
JB
Posted at 18:58h, 27 OctoberCan I use a bone folder or also a knife?
Creative
Posted at 06:34h, 28 OctoberI think the bone folder may be too thick. Try using the knife to score the folds by making a really light cut that doesnt go through the paper.
new
Posted at 00:41h, 14 Decemberi can’t print .
->Print out the template here: Christmas Pop Up Card: Complex Pyramid Tree
?_?……..
Creative
Posted at 06:42h, 14 DecemberTry downloading the latest copy of Adobe reader. Then you can save the .pdf file to your computer and print it out.
Pax Nidorf
Posted at 10:07h, 19 DecemberHi,
You are wonderfully creative. Thank you for sharing your gift.
Surely you have a Cricut to do your cutting! Makes life easy and fun.
Joyous Christmas,
Pax
Creative
Posted at 16:16h, 19 DecemberActually, I have a Klik-n-Kut and a new Silhouette Cameo. I’ve been so busy, I haven’t even opened the box!
Carol Melancon
Posted at 10:09h, 02 JuneCould you please release a .studio file for this card?
Creative Rich
Posted at 23:41h, 02 JuneJust uploaded a new set of files which include the .studio files and an outside card.
Quynh Anh Ton
Posted at 01:57h, 01 Januaryit so cool….i love it…..thanks…….